Wednesday, February 29, 2012

Control Magnetic Levitation System - SYSTEM IDENTIFICATION


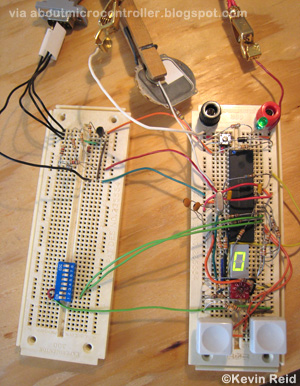
Magnetic Levitation SYSTEM IDENTIFICATION
A fundamental concept in science and technology is that of mathematical
modeling. System identification is conducted to obtain the plant transfer function
needed for the control design. Once a good model is obtained and verified, a
suitable control law can be implemented to compensate the plant instability and
improve performance.


Analytical Model
Analytical and experimental plant models were obtained for comparison
and verification. According to T. H. Wong, laboratory-scale maglev systems are
represented with electrical and mechanical equations [1]. Figure 3 shows the RLC
coil circuit that displaces the steel ball using electromagnetism.


more


Determination of the Levitation System Model
The force/current/displacement relationship in the considered equipment given in Fig. 5
is extremely difficult to determine using an analytic method. Moreover, the obtained approximate
analytical expression f(x, i) is very complex for the further experimental purpose
[3]. However, the magnetic force characteristics may be experimentally calibrated as
a function of the applied current I and the ball position X. Namely, the experiment could
be consisted of resting the levitation metallic sphere on a non-magnetic stand directly
under the electromagnet. This special kind of xyz-stage (some solutions are shown in
Fig.8(a)-(c)) should be capable, for example, of 1mm incremental positioning and determining
the minimum current required to pick up the ball at various heights. Then the
model of the force/distance relationship can be determined by means of least squares fitting.
Note, that the validity of such obtained curve is limited to some range
Xmin ≤ X ≤ Xmax. At the moment, in the Laboratory of Automatic Control at the Faculty of
Electronic Engineering in Niš, the problem of the remote placement of the steel sphere
among the vertical axis of the electromagnet is still not realized adequately. Hence, this is
one of the basic problems in remote control of MagLev system in the underdeveloped
web-based laboratory at the Faculty, which was established in order to support learning in
automatic control. For now, as shown in Fig. 8, it is expected that the ball be placed along
the electromagnet vertical axis by the laboratory technician.
more


Magnetic Levitation System
General Description
The process consists of a disk whose position can be controlled by a top and a bottom coil. Depending on which coil is used, this system can be either open loop stable (using the bottom coil) or unstable (using the top coil). Disk position is measured by laser sensors. The coil voltage is limited to [0, 3] V .


Initial tests perform system identification to quantify
the plant parameters and measure the strong
nonlinearities. Early experiments demonstrate application
of simple linear closed loop control to stabilize
and regulate the closed loop system about some
setpoint. It is shown that for the open loop stable
plant, (see front page) the system is stabilizable for all
positive gains but that for the unstable plant a minimum
gain (bandwidth) is necessary for closed loop
stability. Further tests vividly show the effect of the
nonlinear dynamics on closed loop tracking control
(see upper plots). By inverting these dynamics, rapid
and precise tracking control is demonstrated.


more


Design and Implementation of a Controller for a
Magnetic Levitation System


System Analysis and Design
1. Dynamic Model Analysis
The magnetic levitation system in this paper is
illustrated in Figure 1a; it keeps a steel ball suspended
in the air by counteracting the ball’s weight with
electromagnetic force. x(t) is the distance between the
steel ball and the electromagnet. X0, the reference
position, is the proper levitation distance. The electromagnetic
force, f(x,t), acts on the ball, which can
be expressed as the following dynamic formula in an
upward direction according to Newton’s law.


Control system block diagram of the magnetic levitation
system.


more


Design of Magnetic Levitation Controllers Using Jacobi Linearization, Feedback Linearization and Sliding Mode Control
THE goal of this project was to design three (one linear;two nonlinear) magnetic levitation controllers for the system shown in Fig. 1. Despite the fact that magnetic levitation systems are described by nonlinear differential equations [2], a simple approach would be to design a controller based on the linearized model (Jacobi linearization about a nominal operating point [6]). But this means the tracking performance deteriorates rapidly with increasing deviations from the nominal operating point. Nevertheless, a controller based on Jacobi linearization is a good ”litmus test” for our system identification, hence this controller is designed first.


II. SYSTEM IDENTIFICATION (BART AND KEVIN)
A. Physical Description of the System Components (KEVIN)
In Fig. 1, the different components are:


_ HV oltage to Current Inverter: This subsystem converts the output voltage from our controller into input current for the electromagnet .The reason for using this system is to separate the power amplifier (for a high current sink like the electromagnet) from the controller.


_ HSensor Electronics: For our Jacobi Linearization based controller, we use a simple red LED and a photoresistor. The reason for this is we emperically found that we need large gain values for the Hall Effect sensor solution. But for our nonlinear controllers, in order to sense a wider range of motion for the ball, we obtained data from two Melexis [4] Hall Effect sensors s1 and s2. We need two sensors instead of one because we emperically determined that the reading from a single sensor is
saturated by the magnetic field of the electromagnet. We are able to subtract the readings of the two sensors to get a nonlinear voltage function for the position of the ball.


_ Electromagnet: This is our plant, the model is derived below.


_ Controller: Designing this subsystem was the goal of this project. Again, as stated earlier, we were only able to design and implement the Jacobi linearization version.
more

Buy Cheap Magnetic Levitation Toy
read more "Control Magnetic Levitation System - SYSTEM IDENTIFICATION"

Saturday, February 25, 2012

Control Modeling of Magnetic Levitation System


Magnetic Levitation System Modelling
Figure 2 below shows the simplified diagram of Maglev
system (adapted from Feedback Instrument Ltd.
manual).


Figure 2. Simplified Maglev System Diagram
The photo-sensors measure the ball’s position. Corresponding
to the ball’s position from the electromagnet,
the sensor generates a voltage output (Vsensor) obeying
the following relation:
more


Magnetic Levitation System description and modelling
This work was concerned with the dynamics of the Feedback Magnetic Levitation System c° , which is depicted in Figure 1. Magnetic Levitation Circuit The infrared photo-sensor is assumed to be linear in the required range of operation, yielding a voltage y that is related to distance h as y = °h + y0, where the gain ° > 0 and the offset y0 are such that y 2 (−2V, +2V ). Current i is regulated by an inner control loop, and is linearly related to the input voltage u as i = ½u + i0 with ½ > 0 and i0 > 0.


The working excursion of u is limited between −3V (corresponding to a null coil current) and +5V (saturation value). Rates of change larger than 50V/s for u cannot be implemented by the current driver along its entire working range.


more


MODELLING AND SIMULATION OF A MAGNETIC LEVITATION SYSTEM
Abstract. The electromagnetic levitation system (MLS) is a mechatronic system already
acknowledged and accepted by the field experts. Due to a synergic integration of the sensorial elements, the control subsystem and the actuating subsystem, the mentioned levitation system becomes an especially recommended subject in the academic curricula for mechatronic study programmes. This paper intends to initiate the investigation of different modelling, simulation and control possibilities for a magnetic levitation system starting from a real, physical reference model.
more


Buy Cheap Magnetic Levitation Learning
read more "Control Modeling of Magnetic Levitation System"

Wednesday, February 22, 2012

Control Model of Magnetic Levitation System


MODEL OF THE MAGNETIC LEVITATION SYSTEM
Figure shows the experiment model for the
Maglev system that has been carried out in a
project at National key lab for Digital Control &
System Engineering, Vietnam.


Diagram of magnetic levitation


The Maglev system in the model contains two
feedback sensors. One is a small current sense
resistor in series with the coil. The other is a
phototransitor embedded in the chamber pedestal
and providing the ball position signal. After
amplifying, both current sensor and phototransitor
are wired to analog inputs of card PCI-1711. The
control signal from the computer is sent to the
controllable voltage source through the analog
output of card PCI-1711.
more


EXPERIMENTAL APPARATUS AND CONTROL MODEL
Figure 1 shows the single-axis magnetic levitation
system used in the experiment. The levitation object is a
ping-pong ball with a permanent magnet attached inside it
to provide an attractive force. The attraction force is
controlled by means of a computer-controlled electromagnet
mounted directly above the ball. A light source and a
linear image sensor (LIS, Hamamatsu S5462-512Q) are
used to determine the displacement of the ball. There are
512 photo diode cells in LIS, and the length of each cell is
0.05mm. The light source and the sensor are tuned such
that the outputs of the photocells are saturated when the


Schematic diagram of the magnetic levitation system.


ball does not cover the cells. A comparator is used to
compare the outputs of each cell with a preset voltage to
judge whether the cell is saturated or not. We then obtain
the levitation displacement of the ball by utilizing a counter
to count the numbers of saturated cells. The sampling rate
used is 200 Hz. This low sampling rate is used due to the
bandwidth limitation of LIS. The control computer is an
industrial personal computer with a Pentium processor
and an Advantech PCL818H analog I/O and counter
board.
more


MAGNETIC LEVITATION SYSTEM
In this section, a physical maglev system and its components are described. Presenting system equations nonlinear and linear models are developed for the plant. The schematic of the MAGLEV plant is presented in Fig. 3.1 below:


more


MODEL OF THE MAGNETIC LEVITATION SYSTEM
Diagram of the magnetic levitation system.


Consider the magnetic levitation system shown in Fig. 1. this
is a popular gravity-based one degree-of-freedom magnetic
levitation system, in which an electromagnet exerts attractive
force to levitate a steel ball (in some references a steel plate is
levitated). The system dynamics can be described in the
following equations
more

Buy Cheap Magnetic Levitation Learning


read more "Control Model of Magnetic Levitation System"

Sunday, February 19, 2012

Control Magnetic Levitation System Control - NEURAL NETWORK


AN INTRODUCTION TO THE USEOF NEURAL NETWORKS IN CONTROL SYSTEMS
SUMMARY
The purpose of this paper is to provide a quick overview of neural networks and to explain how they can be used in control systems. We introduce the multilayer perceptron neural network and describe how it can be used for function approximation. The backpropagation algorithm (including its variations) is the principal procedure for training multilayer perceptrons; it is briefly described here. Care must be taken, when training perceptron networks, to ensure that they do not overfit the training data and then fail to generalize well in new situations. Several techniques for improving generalization are discussed. The paper also presents three control architectures: model reference adaptive control, model predictive control, and feedback linearization control. These controllers demonstrate the variety of ways in which multilayer perceptron neural networks can be used as basic building blocks. We demonstrate the practical implementation of these controllers on three applications: a continuous stirred tank reactor, a robot arm, and a magnetic levitation system.


Application - Magnetic Levitation System
Now we will demonstrate the predictive controller by applying it to a simple test problem. In this test problem, the objective is to control the position of a magnet suspended above an electromagnet, where the magnet is constrained so that it can only move in the vertical direction, as shown in Figure


Magnetic Levitation System
more


NEURAL NETWORK-BASED ROBUST TRACKING CONTROL FOR MAGNETIC LEVITATION SYSTEM
ABSTRACT
This paper proposes a robust tracking controller with bound estimation based on neural network for the magnetic levitation system. The neural network is to approximate an unknown uncertain nonlinear dynamic function in the model of the magnetic levitation system. And the robust control is proposed to compensate for approximation error from the neural network. The weights of the neural network are tuned on-line and the bound of the approximation error is estimated by the adaptive law. The stability of the proposed controller is proven by Lyapunop theory. The robustness effect of the proposed controller is verified by the simulation and experimental results for the magnetic levitation system.
more

Buy Cheap Magnetic Levitation Learning
read more "Control Magnetic Levitation System Control - NEURAL NETWORK"

Thursday, February 16, 2012

Schematic New Generation of Atmel maXTouch

Atmel has announced the maXTouch E Series of single-chip capacitive touchscreen controllers for touchscreens from 2 to 12 inches. The mXT224E, mXT384E, mXT540E and mXT768E devices offer enhanced analog sensing with a third generation capacitive touch engine and Atmel's advanced AVR® architecture optimized for capacitive sensing. Offering 224 to 768 nodes, the new series enables system designers to select the industry's most advanced single-chip solution for their touchscreen size and application.

Atmel MaxTouch
Atmel maXTouch E Series offers enhanced analog sensing to dramatically improve performance, reduce system power and lower system cost
First single-chip 32-bit solutions for smartphones, e-book readers and tablets up to 12 inches
Since system noise poses the greatest challenge to touchscreen performance, all devices in the maXTouch E Series offer enhanced analog sensing with improvements to maXTouch's industry–leading noise immunity. The enhancements enable system designers to use lower-cost, shieldless touch sensors, or to take advantage of thinner touchscreen configurations with higher levels of integration. These include "touch–on–lens" and "on–cell" configurations, where the touch sensor is patterned on the protective cover lens or on the display panel, respectively.

maxTouch diagram layout

The enhancements also allow the use of noisy, lower-cost displays and chargers for additional system cost savings.

read more "Schematic New Generation of Atmel maXTouch"

Tuesday, February 14, 2012

Control Magnetic Levitation System Control - SLIDING MODE CONTROL


SLIDING MODE CONTROL OF A MAGNETIC
LEVITATION SYSTEM
Introduction
Magnetic levitation systems have practical importance in many engineering systems such
as in high-speed maglev passenger trains, frictionless bearings, levitation of wind tunnel
models, vibration isolation of sensitive machinery, levitation of molten metal in induction
furnaces, and levitation of metal slabs during manufacturing. The maglev systems
can be classified as attractive systems or repulsive systems based on the source of levitation
forces. These kind of systems are usually open-loop unstable and are described by
highly nonlinear differential equations which present additional difficulties in controlling
these systems. Therefore, it is an important task to construct high-performance feedback
controllers for regulating the position of the levitated object.
more


H∞CONTROL AND SLIDING MODE CONTROL OF MAGNETIC LEVITATION SYSTEM
ABSTRACT
In this paper, H∞disturbance attenuation control and sliding mode
disturbance estimation and compensation control of a magnetic levitation
system are studied. A magnetic levitation apparatus is established, and its
model is measured. Then the system model is feedback linearized. A H∞
controller is then designed. For comparison, a sliding mode controller and a
PID controller also were designed. Some experiments were performed to
compare the performance of the H∞controller, the sliding mode controller and
the PID controller.
more


High performance variable structure control of
a magnetic levitation system
Abstract- In this paper the position-tracking problem of a
voltage-controlled magnetic levitation system is considered. It is
well known that the control problem is quite complicated and
challenging duo to inherent nonlinearities associated with the
electromechanical dynamics. A sliding mode control is employed
for controlling the system. The proposed controller exhibits
satisfactory robustness in response to parameter uncertainties.
Simulation results reveal the effectiveness of the proposed robust
controller.
more


ADVANCED SLIDING MODE STABILIZATION OF A LEVITATION SYSTEM
Abstract
Levitation bearings are intrinsically unstable, nonlinear and
highly uncertain systems. In this paper, we focus our attention
on sliding mode controllers which allow robust design and
more particularly on second order sliding mode control which
appears very relevant with respect to the process structure.
more

Buy Cheap Magnetic Levitation Toy

read more "Control Magnetic Levitation System Control - SLIDING MODE CONTROL"

Friday, February 10, 2012

Schematic Heart rate (beats) Meter with Microcontroller AT89c51

This is revised version of heart beat monitor located in this blog ob post.
http://microcontroller.circuitlab.org/2010/07/heart-beat-monitor-with-microcontroller.html
There were some question asked related to this project. So i decided to redesign the project and make some necessary changes in the algorithm to measure the heart pulses per minute.

The heart rate meter is used to measure the heart beats per minute from finger placing between the sensor. The sensor is made of simple photo resistor and LED. The pulses from the circuit are them amplified and converted into TTL logic pulses using comparator Operational Amplifier.
The analog section of the project is same and taken as such from the last post on this project. Student can take the circuit diagram from that post, if it is not clear. However the LCD connection to Microcontroller are changed in this post. As describe earlier this post is written in the response of student questions so the hardware is slightly changed. If you are familiar of electronics and lcd PIN connection, then you will notice there are not major changes. for LCD details like PIN connection and interfacing with microcontroller, you can just read some related post in this blog. Sufficient material is uploaded for the interfacing of LCD with microcontroller.
In this project, we have used one line 16 character LCD, but any other similar LCD can be connected.
Circuit diagram of the heart rate monitor is shown below.

Heart beat monitor circuit with Microcontroller AT89c51, LCD display, heart pulses circuit diagram, microcontroller based heart beat monitor
The code is written in keil C51 compiler. The c code listing for heart rate (beat) monitor is given below.
#include // plz ad the reg51 . h file
#include // plz ad the string . h file

#define lcdport P2 // chnage it for ur hardware
sbit rw = P3^7; // LCD connection may be different
sbit rs=P3^6; // LCD interface with microcontroller
sbit en=P3^5; // Enable pin of LCD
unsigned char sec,sec100;
unsigned int bt,tick,r,bpm;
void lcdinit();
void lcdcmd(unsigned char);
void lcddata(unsigned char);
void send_string(unsigned char *s);
void msdelay(unsigned int);

void extrint (void) interrupt 0 // external Interrupt to detect the heart pulse
{
bt=tick; // number of ticks are picked
tick=0; // reset for next counting
}
void timer0 (void) interrupt 1 using 1 // Timer 0 for one second time
{
TH0 = 0xdc; //The value is taken for Ssc/100 at crystal 11.0592MHz
sec100++; // It is incremented every Ssc/100 at crystal 11.0592MHz
tick++; // This variable counts the time period of incoming pulse in Sec/100
if(tick>=3500){tick=0;} // tick are limited to less trhan 255 for valid calculation
if(sec100>=100) // 1 sec = sec100 * 100
{
sec++;
sec100=0;
}
}

void main()
{
P0=0xff;
P1=0xff;
P2=0xff;
P3=0xff;
rw=0;
EA = 1;
TMOD = 0x21;
IT0 = 1;
EX0 = 1;
ET0 = 1;
TR0 = 1;

msdelay(1000);
lcdinit();
msdelay(1000);
send_string("Heart beat ");
msdelay(1500);

msdelay(500);

//delay(15000);
bpm=0;bt=0;

while(1)
{

if(sec>=1)
{
sec=0;
/*
The sampling time is fixed 1 sec.
A variable "tick" is incremented with one tick per 100mSc in the timer 0 interrupt routine.
Each on occurring of external interrupt the value in the "tick" is picked up
and it is set to zero for recounting.
The process continues till next external interrupt.
Formula for calculating beats per minutes is

as tick is the time period in Sec/100. so extract the frequency of pulses at external interrupt
Frequency = (1/tick)* 100 i.e pulses /sec
Then
bpm = frequency * 60 for one minutes i.e pulses per minute
in short we can do it as
bpm = 6000/ bt

*/
lcdcmd(0x02);
if(bt>=7){
bpm = 6000/bt; // for valid output bt is limited so that it should be greater than 6
msdelay(500);
send_string("Pulse. ");
lcddata((bpm/100)+0x30);
r=bpm%100;
lcddata((r/10)+0x30);
lcddata((r%10)+0x30);
send_string(" bpm ");
}
else {
send_string("out of range");} // otherwise bpm will be shown zero, if limit does not fit for your project you can change it.
}
}
}
void lcdinit()
{
msdelay(100);
lcdcmd(0x01);
msdelay(500);
lcdcmd(0x38);
msdelay(500);
lcdcmd(0x38);
msdelay(500);
lcdcmd(0x38);
msdelay(500);
lcdcmd(0x06);
msdelay(500);
lcdcmd(0x0c);
msdelay(500);
lcdcmd(0x03);
msdelay(500);
msdelay(500);
}
void lcdcmd(unsigned char value)
{
rs=0;
lcdport=value;
msdelay(100);
en=1;
msdelay(100);
en=0;
msdelay(100);
rs=1;
}
void lcddata(unsigned char value)
{
rs=1;
lcdport=value;
msdelay(10);
en=1;
msdelay(100);
en=0;
rs=0;
}
void msdelay(unsigned int i)
{
//unsigned int i;
while(i --);
}
void send_string(unsigned char *s)
{
unsigned char l,i;
l = strlen(s); // get the length of string
for(i=1;i<=l;i++)
{
lcddata(*s); // write every char one by one
s++;
}
}

This post is related to following topics:
biomedical instrumentation, easy way to monitor pulses from heart on finger, measure heart beats pulses with microcntroller 8051, pulse rate of a human heart,A heart rate monitor is a personal monitoring device which allows a subject to measure his heart rate in real time or record his heart rate,
Digital heart rate meter using microcontroller 8051.
microcontroller based heart rate meter,8051 pin diagram,invention heart rate meter,heart meter watch,heart beat monitor project,microcontroller based heart beat monitor,8051 isp programmer,heartbeat monitor and display on LCD,heart beat rate monitor with sensor,training heart rate monitor with comaprators ans sensor,8051 microcontroller application,optocoupler based sensor of runner heart rate monitor,how to measure heart beat, calculate heartbeat just in one second,8051 rtos,limitations of heart rate monitors, quick display of heart monitor,advantages of electronic medical records,electronic medical billing,used electronic test equipment,electronic document management solution,fetal heart rate monitor,wrist heart rate monitor,avr 8051,baby heart monitor,heart beat counter using microcontroller 8051,
read more "Schematic Heart rate (beats) Meter with Microcontroller AT89c51"

Wednesday, February 8, 2012

Control Magnetic Levitation System Control


Design of a Robust Controller for a Magnetic Levitation System
Abstract
A Magnetic Levitation System (Maglev) is considered as a good test-bed for the design and analysis of control systems since it is a nonlinear unstable plant with practical uses in high-speed transportation and magnetic bearings. The objective of this project is to design a robust controller and implement it on a test-bed to help students learn the robust control design. In this project a robust controller for a maglev system is designed, using H-infinity optimization [3]. Complete mathematical models of the electrical, mechanical and magnetic systems are also developed. The design and simulations are performed under a Matlab/Simulink platform. Wincon control software of Quanser Inc. [7] is used to establish the link between the Matlab/Simulink models and the actual magnetic levitation system.
more


Design and Implementation of a Controller for a
Magnetic Levitation System
Abstract
This paper reports on the design of a controller for keeping a steel ball suspended in the air. In
the ideal situation, the magnetic force produced by current from an electromagnet will counteract the weight of the steel ball. Nevertheless, the fixed electromagnetic force is very sensitive, and there is noise that creates acceleration forces on the steel ball, causing the ball to move into the unbalanced region. The main function of this controller is to maintain the balance between the magnetic force and the ball’s weight. According to the analytical method, the mathematical models of this magnetic levitation system were established with the goal of designing the control system. System linearization and phaselead compensation were employed to design the controller of this unstable nonlinear system. The algorithm
proposed in this paper provides a robust closed-loop magnetic levitation system which can stabilize the system over a large range of variations of the suspended mass. The design methods of this system are presented in this paper. And lastly, the hardware is implemented for a scientific demonstration.
more


PREDICTIVE CONTROL OF A MAGNETIC LEVITATION SYSTEM WITH EXPLICIT TREATMENT OF OPERATIONAL CONSTRAINTS
Abstract.
This paper concerns the application of a predictive control methodology to the stabilization and referencefollowing operation of a magnetic levitation process. From a control engineering point of view, the problem is challenging owing to the nonlinear and unstable nature of the plant, the required positioning accuracy and the operational restrictions on the manipulated and controlled variables during transients.


The formulation employed in this work is based on a linear prediction model obtained by linearizing the plant dynamics around the center of the working range of the position sensor.
Offset-free tracking is achieved by augmenting the cost function with a term associated to the integral of the tracking error. Operational constraints on the input (current in the electromagnet coil) and output (width of the air gap between the electromagnet core and the suspended object) of the process are enforced in the optimization process. The optimal control sequence is implemented in a receding-horizon strategy, in which the optimization is repeated at every sampling instant, by taking into account the new sensor readings. The design and validation of the predictive control loop are carried out
by using physical parameters from a real magnetic levitation process. The results obtained by simulation show that the explicit treatment of operational constraints, especially those related to the input variation rate, is fundamental to an appropriate control of the system.
more


MAGNETIC LEVITATION SYSTEM
IN CONTROL ENGINEERING EDUCATION
Abstract.
This paper deals with the magnetic levitation control system of a metallic
sphere, which is an interesting and visually impressive equipment for demonstrating
many intricate problems. In order to stimulate future research, after short description
of the system operation in analogue and digital mode, several open problems in areas
of electrical and control engineering are offered. Also, the paper presents some initial
outcomes in creating a laboratory environment for remote monitoring of the magnetic
levitation equipment.
more


Modeling and Control of a Magnetic Levitation System
ABSTRACT
Magnetic levitation technology has been receiving increasing attention
because it helps eliminate frictional losses due to mechanical contact. Some
engineering applications include high-speed maglev trains, magnetic bearings and
high-precision platforms. The objectives of this project are to model and control a
laboratory-scale magnetic levitation system. The control algorithm is
implemented using assembly language on Intel 8051 microprocessor to levitate
and stabilize a spherical steel ball at a desired vertical position.
more


Inverse Model Based Adaptive Control of Magnetic Levitation System
ABSTRACT
This paper presents, an adaptive finite impulse response
(FIR) filter based controller used for the tracking
of a ferric ball under the influence of magnetic
force. The adaptive filer is designed online as approximate
inverse system. To stabilize the open-loop unstable
and highly nonlinear magnetic levitation system,
PID controller is designed using polynomial approach.
To improve the stability, an adaptive FIR filter
is added along side the PID controller while the
use of the proposed controller has improved tracking.
Since adaptive FIR filters are inherently stable so the
controller remains stable. Experimental results are included
to highlight the excellent position tracking performance.


AFIR addition to improve the stability


more

Buy Magnetic Levitation Learning and Levitation Toy
read more "Control Magnetic Levitation System Control"

Tuesday, February 7, 2012

Schematic Better Kitchen Timer, PIC16F877

The project aim is to build a better kitchen timer. It has four independent count-up and count-down timers, display of current value of user-selected timer, start/stop and digit entry controls, and alarm buzzer.

timer for cooking


The project uses PIC16F877 as main processor. The output part consist of single 7-segment LED display and piezo speaker, while the input part consist of 10-position “BCD” rotary switch, two pushbuttons for set and start/stop, two 8-position DIP switch for timer selection. The project software written in PIC assembly and compile it using gpasm. To write the PIC, it uses XWisp and WLoader.


read more "Schematic Better Kitchen Timer, PIC16F877"

Sunday, February 5, 2012

Schematic Software Freuency meter and pulse width measurement

Software Freuency meter and pulse width measurement.
#include //please includes at89x52 . h
#include //please include intrins . h for _nop_() instructions
#include //please include stdio . h
/********* Function Prototype Declarations********************/
void init_serial_port(void);
void lcd_start_messeges(void);
void init_timer(void);
void init_interrupts(void);
void serial_start_messeges(void);
void waitms(unsigned int );
void waitUS (unsigned char );
void init_lcd(void);
void clearlcd(void);
void putcharlcd(unsigned char);
void putstringlcd(unsigned char *);
void print_str_lcd(unsigned char *);
void write_lcd(unsigned char ) ;
void positioncursor(unsigned char);
/******** END of Declarations*********************************/
sbit rs_lcd = P3^6; // Register Select LCD, 1= Data, 0 = Instruction
sbit en_lcd = P3^7; // Enable LCD H->L enable
sbit rw = P2^2;
sbit osc = P0^1;
sbit heart_beat = P0^0;
sfr16 TIMER2=0xCC; sfr16 RCAP2=0xCA;sfr16 DP=0x82;
/******* END of Definitions ******************************/
/************ Text Messeges ********************************/
unsigned char code msg0[]= "microcontroller.circuitlab.org ";
unsigned char code msg1[]= " At89c52 $";
unsigned char code msg2[]= " Frequency meter $";
unsigned char code msg3[]= " Microcontroller PROJECT $";
unsigned char code msg4[]= " Engineering students$";
unsigned char code msg5[]= "Frequncy Measurement$";
unsigned char code msg6[]= "Cum Digital Clock $";
unsigned char code msg7[]= " Heart beats $";
unsigned char code msg8[]= " are counted$ ";
unsigned char code msg9[]= " which are then $ ";
unsigned char code msg10[]=" displayed on LCD$";
unsigned char code msg11[]=" and as well as$";
unsigned char code msg12[]=" sent to PC$";
unsigned char code msg13[]=" Through Serial port$";
unsigned char code msg14[]=" RS-232$";
unsigned char code msg15[]="Freq=$";
unsigned char code msg16[]="P.W=$";
unsigned char buff [10]; //define 10 byte buffer
unsigned char n; //sprintf return variable
/* end of text messeges block */
// global variables declarations
unsigned char beat1,beat2; //counter for heart beat
unsigned int frequency,pw;
bit count_flag=0, disp_time=1, serial=0, time_incorrect=1;
struct timestruct
{
unsigned int sec,minute,hour;
}time;
unsigned char t2count=20;
/******** Start of Main*****************************/
void main (void)
{
rw = 0 ;//LCD is always Written and never read;
waitms(20); //wait for lcd to get ready
init_serial_port();
serial_start_messeges();
init_lcd();
lcd_start_messeges();
init_timer();
init_interrupts();
RI=1;
while (1)
{
if(disp_time)
{
bit temp_flag; temp_flag=ES; ES=0;
n=sprintf(buff,"%02d:%02d:%02d",time.hour,time.minute,time.sec);
//save time to buffer;
disp_time=0;// clear flag
positioncursor(0x00);
putstringlcd(msg13);// Clear the First LCD Line
positioncursor(0x05);
print_str_lcd(buff);
putchar(0x0D);
puts(buff);
/* time updated*/
if(count_flag)
{
positioncursor(0x40);
putstringlcd(msg13); // Clear LCD Second Line
count_flag=0;
n = sprintf (buff, "%03d",frequency); //conversion to buff
positioncursor(0x40); //Second line
putstringlcd(msg15);
print_str_lcd(buff); //print frequency at second line
putstringlcd("KHz$");
positioncursor(0x4A); //2nd line
putstringlcd(msg16);
puts(msg15);
puts(buff);
n = sprintf (buff, "%05d",pw);
print_str_lcd(buff);
putstringlcd("uSec$");
puts(msg16);
puts(buff);
// printing complete,
/************************************************/
EX0=1; //enable interrupt for further measurements
}
ES=temp_flag;
}
if(beat1++==250){
if(beat2++==100){
beat1=beat2=0;
heart_beat = ~heart_beat;
}}}}
void timer2(void) interrupt 5
{
//every 50 msec
t2count--;
TF2=0;
if(t2count==0){
t2count=20; // 20x50=1000ms=1 Sec
disp_time=1;// update the display on return from interrupt
time.sec=time.sec+1; // increment second
if(time.sec>=60){
time.sec=0; //if sec=60, increment minutes
time.minute=time.minute+1;
if(time.minute>=60){
time.minute=0; time.hour=time.hour+1;
if(time.hour>=13){
time.hour=0;
}}}}}
void exter_intr_0(void) interrupt 0
{
unsigned char temp=TMOD;
TR1=TF1=TF0=0; //clear timer flags
EX0=0; //Disable further interrupts for one sec
serial=0; //timer1 is not available for baud rate generation now
DP=-1000; //1msec delay
TMOD=0x15; //timer 0,1 both 16 bit mode, timer0 as counter
TH1=DPH; TL1=DPL; //load timer 1 to create 1 sec delay
TH0=TL0=0;
TR1=TR0=1; //start timers
while(!TF1); // wait for 1msec
TR0=TR1=TF1=0; // Stop timers
DPL=TL0; DPH=TH0; frequency=DP;
/************ Frequency measured, now measure pulse width*****/
TMOD=0x09; //timer 0,1 both 16 bit mode, timer0 as counter
TH0=TL0=TF0=0;
while(!T0); //wait for pulse to go high
TR0=1; //start timer0
while(T0); // wait for pulse to go low
TR0=0; //stop timer
DPL=TL0; DPH=TH0; pw=DP; //save the timer count to pulse width
/*******************End of measurement*****************************/
TMOD=temp;
TH1=TL1=-26; // for 1200 bps, but it is doubled by setting SMOD bit
TR1=1; // spare timer to generate baud rate
count_flag=1; // display frequency and pulse width on return from interrupt.
}
void print_str_lcd(unsigned char *d)
{
while (n>0)
{
write_lcd(*d);
d++;
n--;
}
}
void clearlcd(void)
{
rs_lcd =0;
write_lcd(0x01);
rs_lcd =1;
}
void positioncursor(unsigned char c )
{
rs_lcd = 0;
write_lcd(0x80 | c);// 1xxx xxxx set address of cursor
waitms(50);
rs_lcd =1;
}
void putstringlcd(unsigned char *d)
{
while(!(*d == '$'))
{
write_lcd(*d);
d++;
}
}
void write_lcd(unsigned char a)
{
P1 = a;
waitUS(250);
en_lcd = 0;
waitUS(250);
waitUS(250);
waitUS(250);
waitUS(250);
en_lcd = 1;
}
void waitUS(unsigned char a)
{
while(--a != 0); /* wait = a * 2 + 5 usec @ 12 MHz*/
}
void waitms(unsigned int a)
{
while (--a !=0)
{
waitUS(247); //500us delay
waitUS(247);
waitUS(247); //500us delay
waitUS(247);
}
}
void lcd_start_messeges(void)
{
positioncursor(0x00); //first line
putstringlcd(msg1);
positioncursor(0x40); //2nd line
putstringlcd(msg2);
waitms(800);
clearlcd();
positioncursor(0x00); //first line
putstringlcd(msg3);
positioncursor(0x40); //2nd line
putstringlcd(msg4);
waitms(800);
clearlcd();
positioncursor(0x00); //first line
putstringlcd(msg5);
positioncursor(0x40); //2nd line
putstringlcd(msg6);
waitms(800);
clearlcd();
positioncursor(0x00); //first line
putstringlcd(msg7);
waitms(800);
clearlcd();
positioncursor(0x00); //first line
putstringlcd(msg8);
positioncursor(0x40); //2nd line
putstringlcd(msg9);
waitms(800);
clearlcd();
positioncursor(0x00); //first line
putstringlcd(msg10);
positioncursor(0x40); //2nd line
putstringlcd(msg11);
waitms(800);
clearlcd();
positioncursor(0x00); //first line
putstringlcd(msg12);
positioncursor(0x40); //2nd line
putstringlcd(msg13);
waitms(800);
}
void init_serial_port(void)
{
SCON = 0x50; /* SCON: mode 1, 8-bit UART, enable rcvr */
PCON |= 0x80; /* set SMOD = 1 for double buad rate */
TMOD |= 0x20; /* timer 1 autoreload mode */
TH1 = -26; /* TH1: -26reload value for 1200 baud @ 12MHz */
TR1 = 1; /* TR1: timer 1 run */
TI = 1; /* TI: set TI to send first char of UART */
}
void init_timer(void)
{
TH2=0x0FF;
TL2=0x00;
T2CON=0x00; // Timer2 auto reload mode
RCAP2=-50000; // for debugging only , actual value =-50000;
TR2=1; // start timer2 to start generating 50ms delays
}
void init_interrupts(void)
{
IE=0xA1; // enable globle, timer2 interrupt, external0 interrupt
PT2=1; //set priority for timer2
ES=1; //Enable serial interrupt
TCON |= 0x05; // low edge triggered for external 0 and external 1 int
}
void init_lcd(void)
{
//LCD module
// D0-D7 -> P1
// RS -> P2.0
// EN -> P2.1
rs_lcd = 0 ; //for cmd
waitms(500);
write_lcd(0x38); //Function Set 0011 1000
waitms(100);
write_lcd(0x38); //Function Set 0011 1000
waitms(100);
write_lcd(0x38); //Function Set 0011 1000
waitms(100);
write_lcd(0x0C); //display off/ON No Cursor No Blinking at cursor
waitms(100);
write_lcd(0x01); //clear Display
waitms(100);
write_lcd(0x06); //Entry Mode Set
rs_lcd = 1 ; // for data
}
void serial_start_messeges(void)
{
bit temp_flag; temp_flag=ES; ES=0;
puts(msg0);
puts (msg2);
puts (msg3);
puts (msg4);
puts (msg5);
puts (msg6);
puts (msg7);
puts (msg8);
puts (msg9);
puts (msg10);
puts (msg11);
puts (msg12);
puts (msg13);
ES=temp_flag;
}
void serial_recieve(void) interrupt 4
{
if(RI){RI= 0;
if(SBUF == 'i'| SBUF == 'I'){puts("Please Enter the Current Time\n");
scanf("%d %d %d",&time.hour,&time.minute,&time.sec);
while(time.hour>12)
time.hour-=12;
ES=0; //once time has been entered the serial interrupt should be disabled
}}}
.
pulse monitor,pulse oxygen monitor,exercise pulse monitor,draft project management software,frequency measurement help desk software,frequency of shopping cart software developement measure ac frequency circuit programming 8051 microcontroller circuit diagram
read more "Schematic Software Freuency meter and pulse width measurement"

Saturday, February 4, 2012

Schematic Circuit diagram of Frequency Counter and Pulse Width Measurement System, Cum Digital Clock

As we discussed in previous pages the functionality of each individual part of the project of Frequency Counter and Pulse Width Measurement System, Cum Digital Clock. Now it is time to discuss the actual circuit diagram of the project based on microcontroller AT89c52.

So here is the Circuit diagram of Frequency Counter and Pulse Width Measurement System, Cum Digital Clock. Introduction of the project is given here.

First of all in this post we are going to list the main components of the pulse width measuring project based on the microcontroller 8052.

List of Componenets of the Microcontroller Project is as follows:

1. The heart of the project is microcontroller 8052.
The microcontroller 8052 is discussed here. The 8052 microcontroller is used for local processing and controling of LCD. The measured resuts are shown on the local liquid crystal display. The microcontroller 8052 is also used to get the incoming pulses and process these, extract useful information from the pulse trains, like frequency, pulse width, duty time, etc. and display these on the LCD. as well as the results are then sent to PC through RS-232.
2. Liquid Crystal Display LCD.
This the main display we used in this project. The project measures the paramters from field or from the incoming pulse trains and then after calculation these paramters are then shown on LCD. The incormation about the LCD is here.
3. Max-232.
As discussed earlier that the measured parameters are displayed on local LCD, as well as these parameters are sent to PC. So there was some special circuitry involved in this phas which is based on MAX-232 IC. The RS-232 can also be used here. The time is also sent to microcontroller from PC. So this is two serial communication though MAX-232. The information about the RS-232 is presented here.

Circuit diagram of Frequency Counter and Pulse Width Measurement System, Cum Digital Clock
.


RPM meter and rotational speed sensor KMI15/1 with, Circuit DIAGRAM Documents ,speed sensor pulses from comparator,repairs,schema,service,Free Download Lcd Circuit Diagram , speed of reaction ,Speed limit alerts and frequency measurement,directly measure substrate coupling noise,samsung,lowest common denominator,Wiring Schematics On-Chip Test Circuit for Measuring Substrate and Line-to-Line, Circuit diagram LCD LED multiplexed moving,interfacing with lcd circuit diagram,Microcontroller Based Schematics Projects / Tutorials ,Schematic Circuit Diagram Speedometer Accurate measurement of speed, meter schematic circuit,frequency meter schematic circuit,projects, High-speed measurement of AC-biased front-end circuit , circuit diagram, Microcontroller, 8051, AVR,Measuring system for high-speed operation of superconducting test circuit, Dual RS232 Communication Routine with LCD,What is the speed sensor circuit code P0720 Controller Project schematics ,collection of Electronic Schematic Circuit, industrial field measurement or measure vehicle speed when the engine speed circuit diagrams microcontroller,small microcontroller project, Right front and left front speed sensor. Each speed sensor circuit ,speed of a digital system ,circuit diagram and programming code Circuit to measure speed of light,DC MOTOR SPEED CONTROLLER Interfacing LCD with 8051,Atmel 8051 Flash Based-Microcontroller,Schematic for air flow detector electronic circuits diagrams microcontroller sleep schematic,Hall sensors are commonly used to time the speed of wheels and shafts, circuit diagram with lot of infromation. increase or decrease the measurement speed Programming Programming example for microcontroller,Description of Speed Measuring Circuit using 8051 microcontroller (AT89C51). Basic schematic circuit of optical encoder 8051 Microcontroller(AT89C51),The Circuit Diagram The circuit diagram of the project ,Speed test circuit reaction of is simple planning the microcontroller PWM motor speed control Servo motor info and schematics,DC motor speed control schematic Circuit based o n SCR KJZ1 KJZl DC motor ,Speed measurement circuit using integrated speed sensor ,Air Flow Detector Microcontroller controlled AN OPTICAL INTEGRATED CIRCUIT FOR VELOCITY MEASUREMENT,
read more "Schematic Circuit diagram of Frequency Counter and Pulse Width Measurement System, Cum Digital Clock"

Schematic MAX 232 Interfacing with Microcontroller 8052

MAX232 is used to interface the microcontroller to standard RS-232 port of personal computer. It is a signal level converter necessary for conversion between TTL and RS-232 standards.

MAX 232 Interfacing with Microcontroller 8052, how to develp circuit diagram of microcontroller and RS-232


PIN configuration of IC MAX232, function of PINs of RS-232 serial communication

The MAX232 requires 5 external 10uF capacitors. These are used by the internal charge pump to create +10 volts and -10 volts. The MAX232 includes 2 receivers and 2 transmitters so two serial ports can be used with a single chip. We will only use one transmitter for this project. The only connection that must be made to the 8052 is one jumper from pin 3 of the 8052 to pin 11 of the MAX232.
The circuit diagram shown below illustrates the connection of RS232 with microcontroller and serial port DB9 connector.Data is transmitted and received on pins 2 and 3 respectively. Data Set Ready (DSR) is an indication from the Data Set (i.e., the modem or DSU/CSU) that it is on. Similarly, DTR indicates to the Data Set that the DTE is on. Data Carrier Detect (DCD) indicates that a good carrier is being received from the remote modem.

Pins 4 RTS (Request To Send - from the transmitting computer) and 5 CTS (Clear To Send - from the Data set) are used to control. In most Asynchronous situations, RTS and CTS are constantly on throughout the communication session. However where the DTE is connected to a multipoint line, RTS is used to turn carrier on the modem on and off. On a multipoint line, it's imperative that only one station is transmitting at a time (because they share the return phone pair). When a station wants to transmit, it raises RTS. The modem turns on carrier, typically waits a few milliseconds for carrier to stabilize, and then raises CTS. The DTE transmits when it sees CTS up. When the station has finished its transmission, it drops RTS and the modem drops CTS and carrier together.

Clock signals (pins 15, 17, & 24) are only used for synchronous communications. The modem or DSU extracts the clock from the data stream and provides a steady clock signal to the DTE. Note that the transmit and receive clock signals do not have to be the same, or even at the same baud rate.

Note: Transmit and receive leads (2 or 3) can be reversed depending on the use of the equipment - DCE Data Communications Equipment or a DTE Data Terminal Equipment.

CTS Clear To Send
DCD Data Carrier Detected (Tone from a modem)
DCE Data Communications Equipment eg. modem
DSR Data Set Ready
DSRS Data Signal Rate Selector (Not commonly used)
DTE Data Terminal Equipment eg. computer, printer
DTR Data Terminal Ready
FG Frame Ground (screen or chassis)
NC No Connection
RCk Receiver (external) Clock input
RI Ring Indicator (ringing tone detected)
RTS Request To Send
RxD Received Data
SG Signal Ground
SCTS Secondary Clear To Send
SDCD Secondary Data Carrier Detected (Tone from a modem)
SRTS Secondary Request To Send
SRxD Secondary Received Data
STxD Secondary Transmitted Data
TxD Transmitted Data
The RS232 connector was originally developed to use 25 pins. In this DB25 connector pinout provisions were made for a secondary serial RS232 communication channel.
Tags:-
MAX 232 Interfacing with Microcontroller 8052, PIN configuration of MAX232, microcontroller 8052 and serial communication, Microcontroller51, circuit diagram of serial communication via rs232,Serial Port Pinout, USB communication,messages through RS232 Cable, wiring the RS232 9 Pin, how to interface RS232 and Data Interfaces with microcontroller,RS232 serial connector pin assignment ,RS232 DB9 to DB25 converter ,RS232 serial loopback test plugs ,RS232 null modem cables , monitor cable ,Serial printer cables ,Yost RS232 on RJ45 standard RS232 support,USB to RS232 converter,Use tan delta measurement to confirm reliability of your cables,Connect USB Printer to PC Parallel Port with LPT2USB Adapter,Virtual port COM, Ethernet 10/100 Rail DIN, Isolated, Industrial Use,how to use the ic RS232, converters from RS232 to RS485, formation of RS 232 Cable, connector RS232 a RJ45,rs-232 pinout,circuit diagram of rs-232c,connector rj-45,serial communication based on rs-485,RS-232 is a standard for communication between devices, such as a modem and computer.Interfacing The Serial / RS-232 PortDetailed explanations on interfacing the serial port.RS232: RS232 Connector wiring RS232 configuration - diagrams of PC connectors for conection of RS232 devices, with and without handshaking. RS232 Specifications and standardPractical discussion of the RS232 standard and its specifications RS232 serial cable pinout information RS232 serial cables and adapters. Pinout and wiring layout for many situations. DB9 to DB25 conversion and null modem wiring diagrams. microcontroller to pc interaction using vb gui application control projects with micro voltmeter using 89c51 with lcd display with circuit diagrams
read more "Schematic MAX 232 Interfacing with Microcontroller 8052"